Then I realized there was no pattern listed. What? I know I hadn't come up with this idea on my own. Where was the pattern? I searched Ravelry frantically, because this sort of thing bugs me. No luck. Kept searching. Still nothing. WTF, mate?
So I googled it, and then I found the source; a post here, about halfway down the page. McLovin (formerly Ax174), I must thank you, because this is such a cool little project. I made several of them, and they travel with me on my purse, knitting bags, etc. I've even given a few away.
But I have become so indoctrinated into the idea that everything, everything should be on Ravelry, that I can't just let it lie. While her post was useful (after all, I made mine by looking at a picture of hers), some people might want a more verbose pattern, with yarn measurements and more explicit instructions.
So here is that more verbose pattern.
I actually don't think it needs pictures to be understood, so I decided not to clutter up this post with them. However, here is a post full of those pictures if you want to have a look.
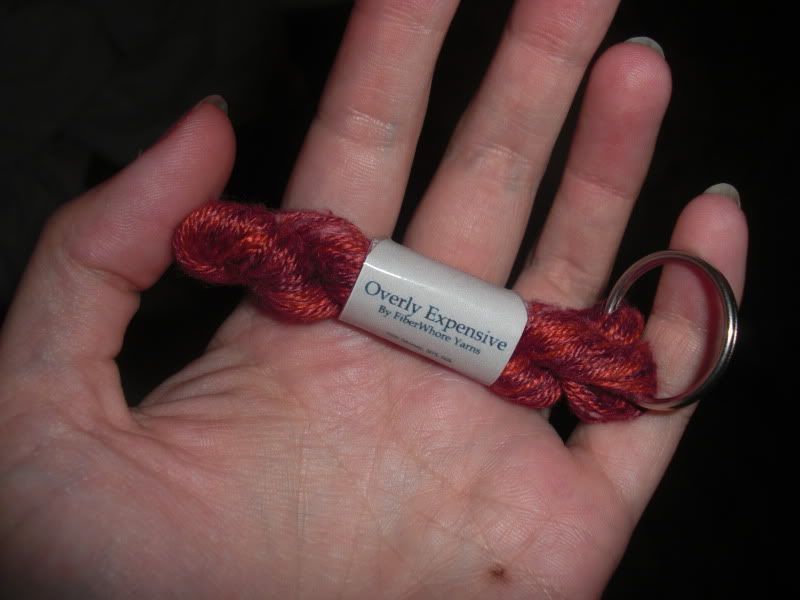
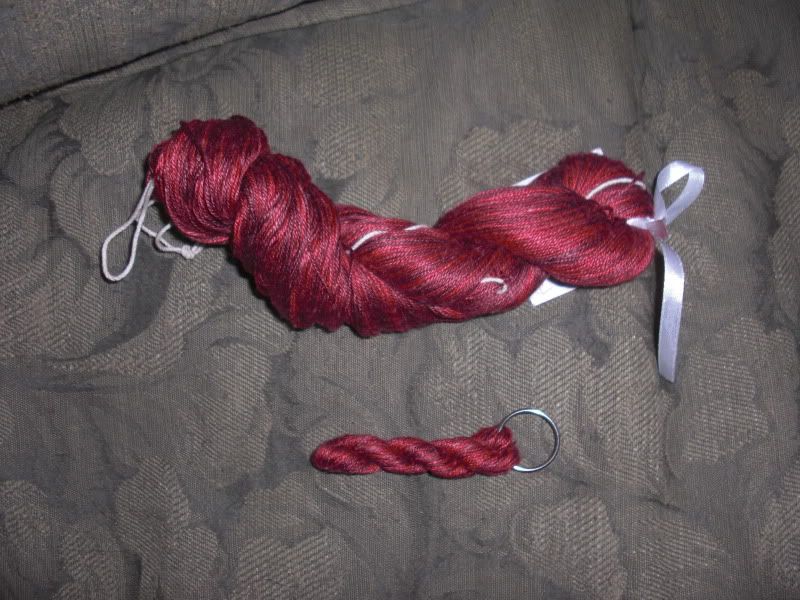
Badge Of Honor Mini-Skein Charm
Materials:
4-10 yards of fingering weight yarn, or 8-20 yards of laceweight. You can try this with sport or DK, but I think it might be a little too bulky to give the right effect. 10 yards makes quite a thick skein; the sample above used around 6. Using fingering weight will make a charm that looks like a miniature worsted or bulky weight skein; using laceweight would make a miniature sock-weight skein.
A pair of needles: exact size is unimportant, but I'd recommmend somewhere from US4-US9, not too huge and not too small. These are only needed to put the proper twist into the skein charm. DPNs or straights are equally good.
A keyring
A piece of cardboard, or a book or magazine
Printer, paper, and clear tape, if you want to make a label.
Directions:
1. Cut your cardboard into a rectangle that is 10 inches long and a few inches wide, or find a book around the same size. If you want a longer, thinner skein, make your cardboard longer than 10 inches or find something else long enough - McLovin mentioned that she wraps hers around a magazine. Wind your yarn around it in the long direction until you run out of yarn. Tie the two ends together very securely, and trim the ends so they are short. If you want to be super sure it won't unwind, then put a drop of superglue on the knot and wait for it to try before continuing.
2. Slip the yarn off the cardboard (don't let it unwind!) and put your two needles into the big loop. Hold the needles as far apart as they will go, with the looped yarn stretched between them. Now, use those needles as handles to twist these loops of yarn up pretty good. You'll know you have twisted it enough when the twist starts trying to loop up on itself a little (if this sounds confusing, try it and you will see what I mean.)
3. Once it's twisted enough, fold it in half, bringing the two needles together. It should twist into a skein shape on its own at this point. If the skein seems too loose, unfold it and twist the yarn some more before refolding.
4. When you're happy with the appearance of your skein, you can take out one of the needles (carefully, so it doesn't unwind) and transfer those loops onto the other needle; this will hold the skein in position.
5. Now it's time to put it on the keyring. This part can be a bit tricky, especially if you have a really stiff keyring. What you need to do is hold the keyring open and slip all the loops of yarn on your needle onto the keyring, the same way you'd put a key on there. I find that sometimes, forcing the ring open, then wedging something like a button in there helps hold it open while you load in the yarn.
Slide the loops all the way around (again, like you do to put a key on) until the skein is completely on the keyring, and you're finished!
If you want to make a label, below are some label templates I made for mine. I printed mine out and covered it with clear packing tape to make it a little more stable, then put it around the skein and taped it closed. Be aware, the label won't hold up to abuse like the skein does - I lost the label off mine some time ago, but I have found that I actually like it better this way, you see more of the yarn.
Now, stick your charm anywhere you feel like it!

1 comment:
What a cute way to market my yarn, Savannah Breeze Alpacas!
look for them at my farm day!
Thanks
Post a Comment